• ******* To read about the changes to the marketplace click here

Skatezen's 75 gallon

skatezen

If you pick it, Flick it!
I've never done a build thread before so I figured this would be a great way to document my tanks growth and development. This tank has spent a long time on the drawing board almost 2 years and I can't believe it's finally come to fruition. There has just been so much that has prohibited the start up of my system, mainly finishing the basement, other relatively large house related projects, a new job and I managed to squeeze in marriage. I'm actually kind of glad I was able to take my time with the planning on this one. I've decided to go bare bottom and there will not be any sand anywhere in the system initially.

System description:
75 gallon Display/Custom stand and canopy
70 gallon rubbermaid stock tank - Sump
40 gallon breeder - Frag Tank
37 gallon - Flow through which will be used for water changes and added water volume

Total gallons 222

Flow:
Sequence Dart - 3600gph on a closed loop through a Calfo style manifold with 8 - 1" outlets

Velocity T4 (1300 gph) split between my frag tank and the display. About 400 - 500 gph will be used for the return. The rest will be routed to the frag tank where it will enter through an OM Squirt

Total flow 58x

Lighting:
2 250w XM 10K's on Icecap Ballasts with Lumenarc Mini's
2 54w T5s actinics D&D Blue+ bulbs

Skimmer:
Mesh/Venturi/Volute/1" Outlet Modded Reef Octopus Recirc DNW-200 <- This thing's a beast! The skimmer will be directly fed from my overflow which spans the whole length of the 4' tank.

Additional Filtration:
Phosban reactor
Carbon reactor

Ca & Alk:
CA Reactor
Kalk Reactor

I will be posting pictures as the system develops as I should have everything completed tomorrow.
 
if you havent bought the 75g Id consider buying a 90. that extra aquascaping is huge. if I had to do it over again I wish I would have purchased a 90 instead of my 75. my 2 cents.

ps sounds like a great plan btw.
 
Thanks Steve,
I've had the 75 for almost 3 years and I've moved with it twice. I've only had it set up for about a total of of 6 months. I really wanted to go with a 120, but it would have been too big for the room it is going in. At the time I couldn't justify buying a whole new tank (the 90 gallon) for 3 more inches of water. I did however leave enough room between the top of the canopy and the ceiling so that if I did want a 90 in the future, it would fit. :) Hopefully, by the time I want another tank, I'll be in a new house with a sun room so that I can utilize natural sunlight. I told my wife she can design the house anyway she sees fit, but I get the basement and the garage.
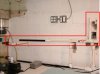
 
im just saying that if you plan on SPS (which ive been slowly transfering my entire system to) the extra 4" of hieght isnt measily. The sps need room to grow upward when maturing. JMO.
 
Agreed.
 
Can anyone find a disadvantage to plumb my overflow to my skimmer this way? I have 2 drains on the right coming from my overflow for redundancy . The pipe along the wall is slightly pitched.
 

Attachments

  • Durso.jpg
    Durso.jpg
    28.6 KB · Views: 441
So if anyone was following this thread you may know that I was planning on updating it with pictures of my progress this weekend. In the process of plumbing everything all together I tripped over the power cord to one of my powerheads in inadvertently aiming it directly at the glass of my very low hanging 250w Aquamedic Oceanlight. Can anyone guess what happened next?

Well the glass cracked and fell into the sump which was holding all my livestock. My initial reaction was to reach into the tank to fix the powerhead, I'm glad I didn't because I would have received quite a shock. After I got everything all shut down I began to pull the chards of glass out of the sump a couple of pieces fell into the orifice of my clam. Hopefully it will be ok and purge the glass without causing any internal damage.

I did mange to start the leak test on my tank, which failed miserably. One of the bulkheads was leaking and I can't easily get to it to swap it out. I won't be able to really get back into the plumbing until this weekend. So I'm going to start wiring up the lights tonight hopefully that will go much smoother.
 
After completing my system I have encountered a couple of problems one is that the vertical drop away from the tank is important in "pulling" water out of the overflow. You can see where it comes through the wall just to the right of the OM Squirt below the ballasts. Initially I was going for the nice gentle flow directly into the skimmer, but this isn't working out too well. Currently their is only about 4"-6" of vertical travel before the water hits the skimmer. My plan to remedy this is to lower the skimmer, but that kind of screws up everything for me. You can see the issue in the pictures below.

The second problem is that I am getting a lot of micro bubbles. Which is easily fixable, I just need time to build some sort of bubble trap.

Right now the water flows like this Display tank->Skimmer->Flow through->Sump-> then tee-ed one line to the frag tank in the picture and one through the wall to the display.

RODI
DSCF1497.JPG

Frag
DSCF1499.JPG

Flow Through and Sump
DSCF1498.JPG

Disregard the water level in the display I had to fix a leaky bulkhead
DSCF1484.JPG


Any suggestions to easily fix this with out going and ripping my stands out?
 
More Photos

Canopy
DSCF1488.JPG

CL Return 1
DSCF1494.JPG

CL Return 2
DSCF1495.JPG
 
That's an awesome return system :eek:
 
Thanks man. I was a long time in the works. Did you ever get the 180 up we were talking about at MACNA?
 
those 55 gal drums look familiar!!!:D
 
those 55 gal drums look familiar!!!:D


HaHa....didn't think you'd remember Brian. That was 3 years ago I grabbed those from you. I stole your water setup too! How are things?
 
HaHa....didn't think you'd remember Brian. That was 3 years ago I grabbed those from you. I stole your water setup too! How are things?

Good, Jeff.....I didn't forget ya....Time does fly though!!!! 3 years:eek:

Hows the house coming along?

That water setup looked familiar....Never seen them like that in any other post.....Than my own!!! ;) Set up looks good!!!!

B
 
House is coming along. It's a lot of work. Once I'm done with the tank, then I have to get into the big stuff, kitchen and bath.

I really like the orientation of the barrels they're meant to lay on their side too, not many people know that, optimally at a 10 degree angle. I connected the two so I can make and store 110 gallons at a time.

Yes exactly.....Adding a peice of wood cut out in the circumference of the barrel with a three inch height will be all you need!!!
 
Your build looks like it's coming along pretty well. I was wondering if the heating pipe (hot water?) in the second pic of reply #8 has asbestos on it? It looks like the same wrap job done on some of the pipes in my basement. If so, any concerns with it over your flow-through tank?

Paul
 
It is, but its my understanding that as long as it's not deteriorating or flaking off there is not much need for concern.
 
Thanks man. I was a long time in the works. Did you ever get the 180 up we were talking about at MACNA?

It's sitting in my living room right now... empty :D
 
It is, but its my understanding that as long as it's not deteriorating or flaking off there is not much need for concern.
Just make sure it's securely wrapped.

As far as being over the sump, I wouldn't worry about it as asbestos is only dangerous (to us anyways) when it's airborne. To render it harmless during removal, workers keep asbestos surfaces wetted down with water so that the fibers cannot become airborne.
 
Back
Top