• ******* To read about the changes to the marketplace click here

Keith’s 50 gallon low boy fish room

dlux5life

Well-Known Member
BRS Member
Hi all! Been a long time since I’ve been on here. Feels good to be back. Been about 10 years since having my last 90 gallon reef. Been threw a marriage, a few houses and finally at a point in my life where I feel truly happy and at a point where I won’t be going anywhere for a long time.

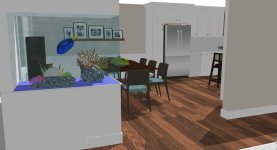
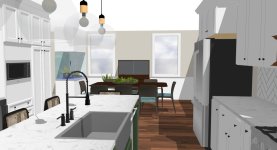
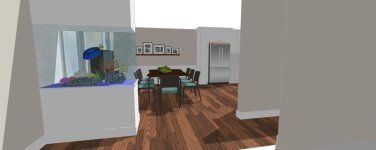
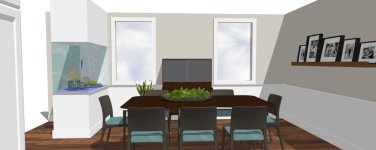
My wife and I have a new kitchen planned and she’s down for putting a reef tank in the wall separating our dining room / kitchen area and hallway to our second floor. That is slated for summer 2027. I have the green light to turn some excess space in our storage room into my fish room to support the tank when we get to that point.

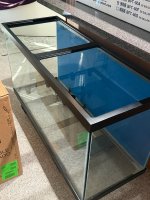
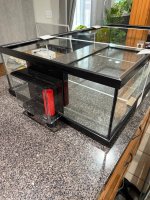
My plan is to grow out sps frags in a 50 gallon low boy, building out a system where I can easily plumb in a main display tank when the time comes. I love the idea of have a stable system and some small colonies to add when the time comes.
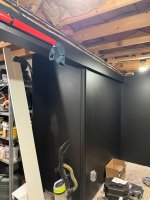
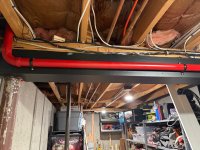
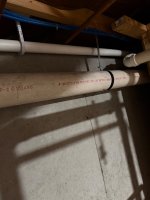
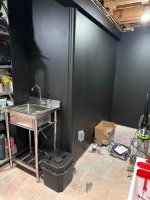
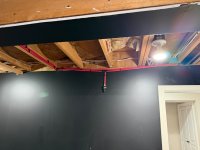
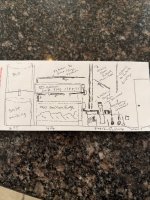
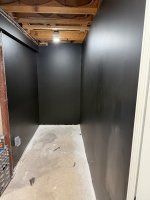
The room:

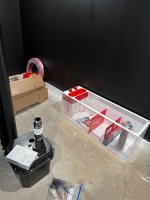
4’ x 11’… Long and skinny. The plan is to have the bulk of the filtration along the right wall, giving me just enough room to move.

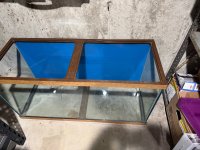
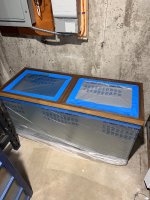
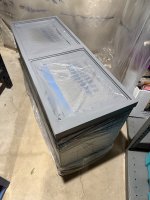
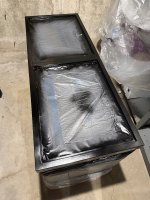
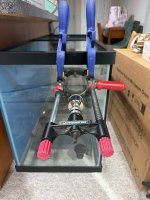
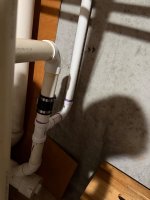
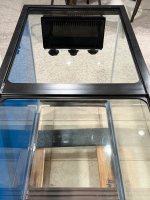
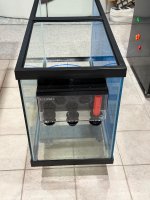
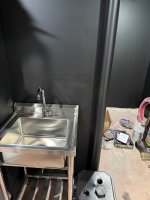
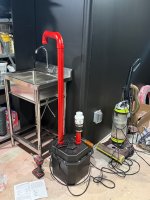
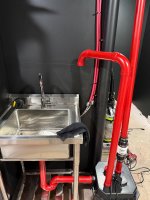
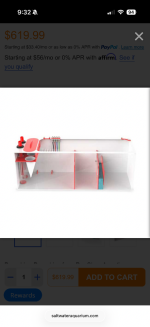
I’ve got a 50 gallon low bow that will be above a 90 gallon fuge plumbed into a redflex reef sump 400. Next to that will be a small basement sink with an ejector pump.

Tight for room, so my mixing station will be two brute barrels stacked on top of each other.

Flooring is going to be some epdm rubber roofing that is run slightly up the wall to try and contain any spill.

Luckily, my wife is an interior designer and is fluent in cad and other modeling softwares. Should have a 3d mock up soon!
 

Attachments

  • IMG_0126.jpeg
    IMG_0126.jpeg
    231.4 KB · Views: 43
  • IMG_0126.jpeg
    IMG_0126.jpeg
    231.4 KB · Views: 41
  • IMG_0127.png
    IMG_0127.png
    260.3 KB · Views: 41
Last edited:
Wife was able to get some renderings with the future tank in it. The corals I grow out in the low boy would eventually transferred into this tank. Not exact dimensions, but showing roughly 4’ long, 24” wide and 30” tall. About 150 gallons. Probably a little taller than I’ll go with in reality for an sps dominant reef.

On the other side of the reef from the dining room is a hallway that goes to the front door and stairs to the second floor of the house.
 

Attachments

  • IMG_0137.jpeg
    IMG_0137.jpeg
    93.7 KB · Views: 48
  • IMG_0136.jpeg
    IMG_0136.jpeg
    102.5 KB · Views: 46
  • IMG_0135.jpeg
    IMG_0135.jpeg
    72.6 KB · Views: 49
  • IMG_0134.jpeg
    IMG_0134.jpeg
    52.6 KB · Views: 47
  • IMG_0138.jpeg
    IMG_0138.jpeg
    85.7 KB · Views: 46
Last edited:
Refugium tank all painted. Waiting for wood drill bits to make my templates and then drilling the side panel in the next day or two. All the hose bibs are shut off for the winter. May wheel these guy to the shower to do the drilling!!
 

Attachments

  • IMG_0144.jpeg
    IMG_0144.jpeg
    320.2 KB · Views: 22
Any suggestions or tips for drilling the side of the tank from the side? I don’t feel comfortable putting this thing on its side to drill from the top. I have a drill press attachment for my drill. Was going to use that and a wood template, obviously water to keep it cool. Thinking something like this (with the wood template held by the clamps as well.
 

Attachments

  • image.jpg
    image.jpg
    279.1 KB · Views: 33
Goodies came! Waiting on rubber flooring before building tanks stands. Sink should be here in a few days and I’ll plumb the RO and connect the laundry pump.
 

Attachments

  • image.jpg
    image.jpg
    245.6 KB · Views: 31
Any suggestions or tips for drilling the side of the tank from the side? I don’t feel comfortable putting this thing on its side to drill from the top. I have a drill press attachment for my drill. Was going to use that and a wood template, obviously water to keep it cool. Thinking something like this (with the wood template held by the clamps as well.
FWIW: I’d put it on its side. As long as that’s a typical framed aquarium, the water being able to pool with some clay around the drill would be worth it.

I’d worry more about a rimless tank on its side.

Grew up with some aquarium pros in Nashua NH, and watched them drill a 20L with 2x 2” holes for a tank one time.

1768655575273.jpeg

(Circa 2003. Oh the good old days of having to run a Mag 18 to power a AquaC protein skimmer )
 
Well you don’t know you have anxiety until you start drilling glass fish tanks!

Got both the low boy and the 90 gallon drilled today. Rolled them over to an extra shower in our in law, sat on the bench and rigged the shower head to trickle on the bit as I drilled. Worked like a gem!

Also managed to get some plumbing work done for the sink that will be arriving Tuesday. I’m not a professional plumber by any means, but feel good about the work so far. Once the sink arrives, I’ll build it and connect the 6 gallon reservoir and pump to it. Still need to put a p trap (likely where the rag is) as this line is connected to my main septic line. I plan on running an open vent from the pump to the room. Just making sure I don’t get sewer gasses making their way in to the home. Making this connection was exceptionally difficult given the amount of plumbing and electrical already in place with the finished basement. Came out really well though!

Still waiting on rubber flooring to arrive. When that comes, I can’t start on stands and moving things in to place.

I have about 70 lbs of old live rock (dry for about 10 years) in a water / bleach mixture. I plan to let that sit with a power head for about a week before putting it in saltwater and seeding with starter bacteria in another brute trash can. I may as well jumpstart my cycle while i build out the rest of the fish room.

I’ve decided to go with a red / black / white theme in the room. Little extra work, but I think it will look nice.
 

Attachments

  • IMG_0173.jpeg
    IMG_0173.jpeg
    209.1 KB · Views: 31
  • IMG_0172.jpeg
    IMG_0172.jpeg
    374.7 KB · Views: 37
  • IMG_0171.jpeg
    IMG_0171.jpeg
    184.3 KB · Views: 33
  • IMG_0170.jpeg
    IMG_0170.jpeg
    193.3 KB · Views: 35
  • IMG_0169.jpeg
    IMG_0169.jpeg
    387.4 KB · Views: 35
  • IMG_0168.jpeg
    IMG_0168.jpeg
    260.2 KB · Views: 32
  • IMG_0166.jpeg
    IMG_0166.jpeg
    234.5 KB · Views: 34
Last edited:
Sink came and managed to put it together while watching the pats game. Maye try to get the drain finished up tomorrow (pun intended)!
 

Attachments

  • IMG_0174.jpeg
    IMG_0174.jpeg
    218.9 KB · Views: 27
  • IMG_0175.jpeg
    IMG_0175.jpeg
    181.9 KB · Views: 31
Finding a little conflicting info on venting these utility pumps. Some are saying it isn’t needed for grey water, which is what I would consider water change water that will be going down this. Others are saying it must be vented through the roof. I’m not sure that is really needed. I’m going to start the easy way and if there are problems I can try to attach it to a vent line. Just so much time and work to make that happen.
 

Attachments

  • IMG_0184.jpeg
    IMG_0184.jpeg
    258.9 KB · Views: 27
sink is plumbed.no leaks! Few trips back and forth to Home Depot, but got the job done.

The tee in the second picture is going to connect to my rodi unit.
 

Attachments

  • IMG_0203.jpeg
    IMG_0203.jpeg
    220.7 KB · Views: 25
  • IMG_0204.jpeg
    IMG_0204.jpeg
    234.9 KB · Views: 26
What are folks thoughts on this holding a 55 gallon low boy tank? I’d also have my 90 gallon fuge underneath, but would build a small wood stand to hold the weight of the tank.
 

Attachments

  • IMG_0222.png
    IMG_0222.png
    379.3 KB · Views: 9
The bench looks sturdy enough but hard to say without feeling weight and quality of materials. I'd love to see how things work out dimension wise with a 90G sump underneath. My concern would be the room to access skimmer. 90G tanks are usually just 75G a little taller. I have a system with tight clearance for cup removal and its a pain in the neck. If you do build a shelf, keep it as low as possible. When is more room ever wrong?....lol
 
The bench looks sturdy enough but hard to say without feeling weight and quality of materials. I'd love to see how things work out dimension wise with a 90G sump underneath. My concern would be the room to access skimmer. 90G tanks are usually just 75G a little taller. I have a system with tight clearance for cup removal and its a pain in the neck. If you do build a shelf, keep it as low as possible. When is more room ever wrong?....lol

Exactly! The 90 gallon would be a fuge, so mainly light and algae harvesting. But same concerns around the potential tight working area. I think if we’re talking about a steel structure, I’d be okay, but would really need to see it to be sure.
 
I've used steel and I don't care what you use or do, rust always appears. I prefer wood for stands. This may sound odd, but why even have a shelf for the sump on that bench? If your floor is flat just put the mat directly on the floor. Theres a few inches....
If you want leak detection or containment, the mat could sit inside a tray or pan that's directly on the floor.
I need the 90 gallon tank / fuge up at least 4” from the ground in order for it to gravity feed into my sump if my sump is directly on the ground.

The low bow would be on top of and drain into a 90 gallon fuge. The 90 gallon fuge would drain into my sump. The sump is tall enough that I need some elevation on the 90 gallon fuge to be able to drain into the sump.

Thanks for the advice about the stand materials. The seller of that item reached out and it isn’t the same size as what was in the listing. I’ll probably end up building my own rack system out of wood.
 
Back
Top