bigmike76l
Non-member
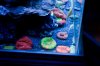
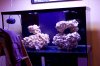
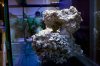
Sweet setup Ronnie! The color coordination is awesome! Can't wait to see the best looking softy tank get bigger! Are you going to use the same ATI light fixture on the 120? Nice job!! 
Thank youeverything is so pretty and color coordinated....nice job!
That is for the new red clubVery very nice Ronnie!
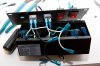
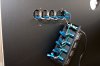
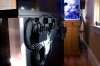
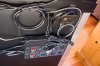
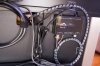
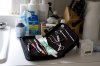
Love the plumbing!
Now where have I seen that red plumbing thing before?
Hehe
") Just saw your progress sweet. Thank you for the kind words
Just saw your progress sweet. Thank you for the kind wordsYes, same light. Some of my softy's have there sun glasses on so when they go into the 120 should look better.Sweet setup Ronnie! The color coordination is awesome! Can't wait to see the best looking softy tank get bigger! Are you going to use the same ATI light fixture on the 120? Nice job!!
")
Thank you, After seeing your thread motivated me to start my own.Ronnie
1st time viewing this thread.
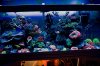
Beautiful tank and I like the meticulous work that you have put into your build.
Fantastic…..
Thanks Daniel, you are welcome to stop byLook great, nice detail job you did. Have fun and good luck
Pictures are coming thing are showing up quicker than I expected. I'm just dragging feet. Did some rewiring water tested is done in the next week or two the move is going to happen not looking forward to it.No updates in a couple of days....something tells me he's working very hard getting it finished. Hurry up Ronnie we want to see pictures


I'll let you knowAll you need now is a nice LED setup on that tank in perhaps a red fixture!
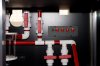
Red does rule I'm also collecting some red corals.Geez, i thought I was done painting red....
Now I have to paint my reactors to keep up.....
Red rules
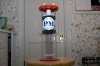
That is a nice looking reactor.
While I am at it I might as well paint my skimmer as well. LOL
I am starting to get envious of the new gear.
edit: my return lines are all painted red now as well.
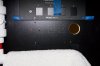
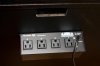
Your tank looks amazing can't wait to see it finished. Thanks JenniferThank you, Gregg I'm trying to keep it very very neat. and clean looking.Pretty slick setup
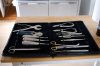
The neatness meter is off the charts, not even a smudge.
Nice Job
We use essential cookies to make this site work, and optional cookies to enhance your experience.