-
******* To read about the changes to the marketplace click here
You are using an out of date browser. It may not display this or other websites correctly.
You should upgrade or use an alternative browser.
You should upgrade or use an alternative browser.
yet another build thread (180 inwall)
- Thread starter cilyjr
- Start date
OP
OP
cilyjr
Chris
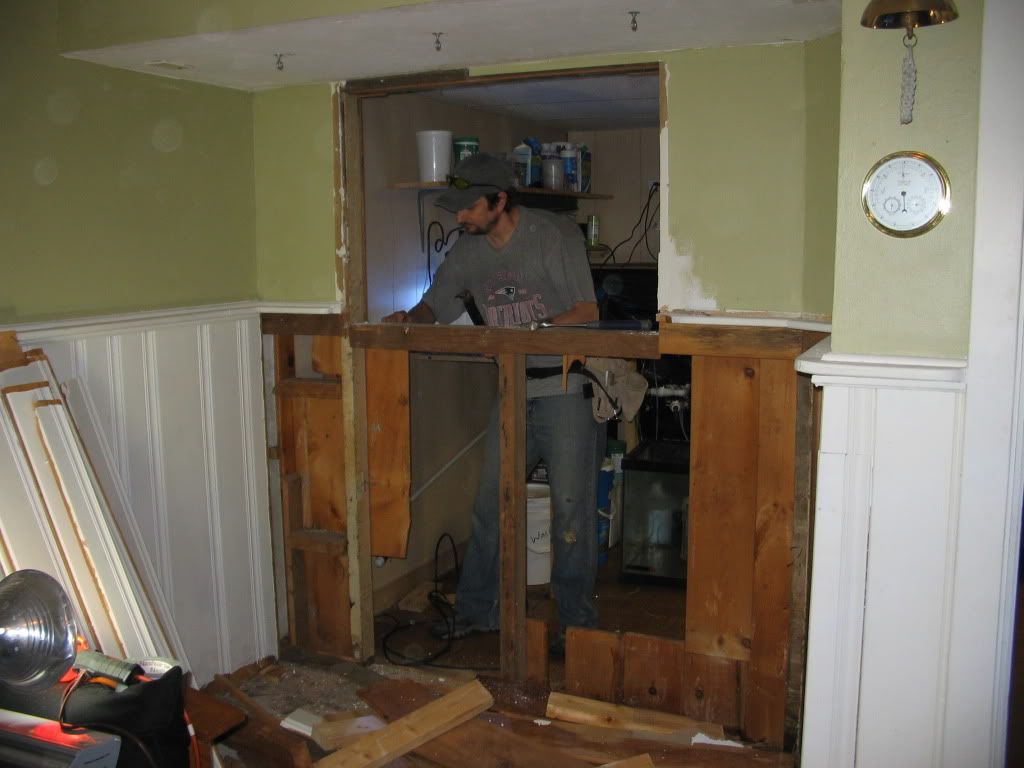
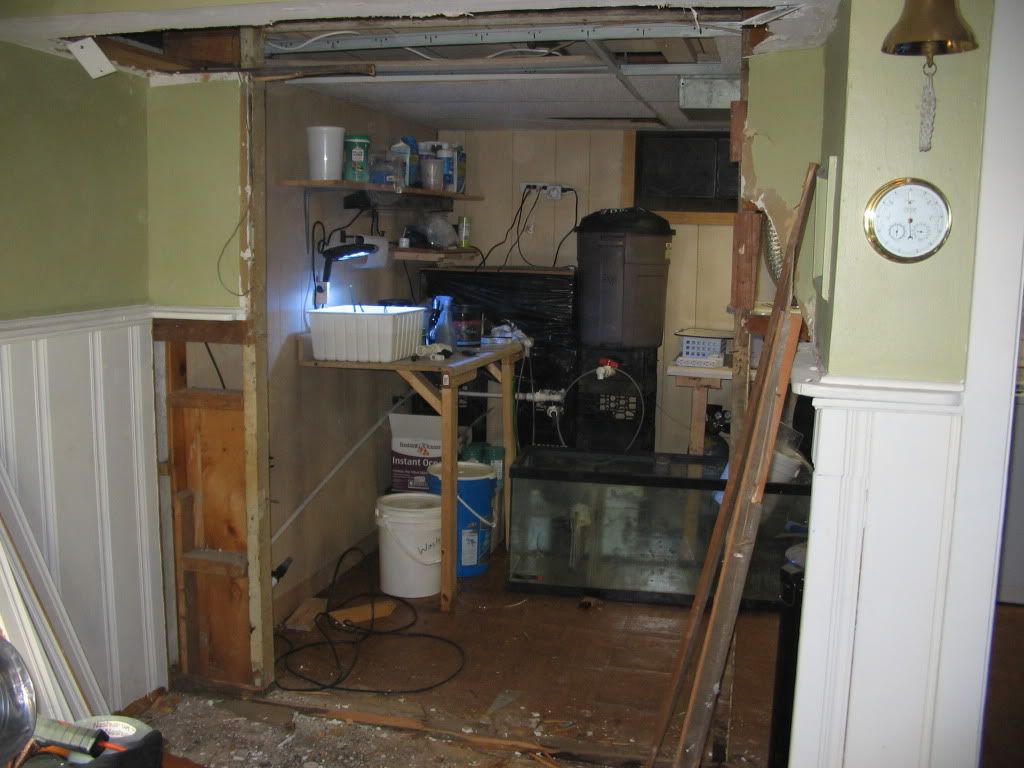
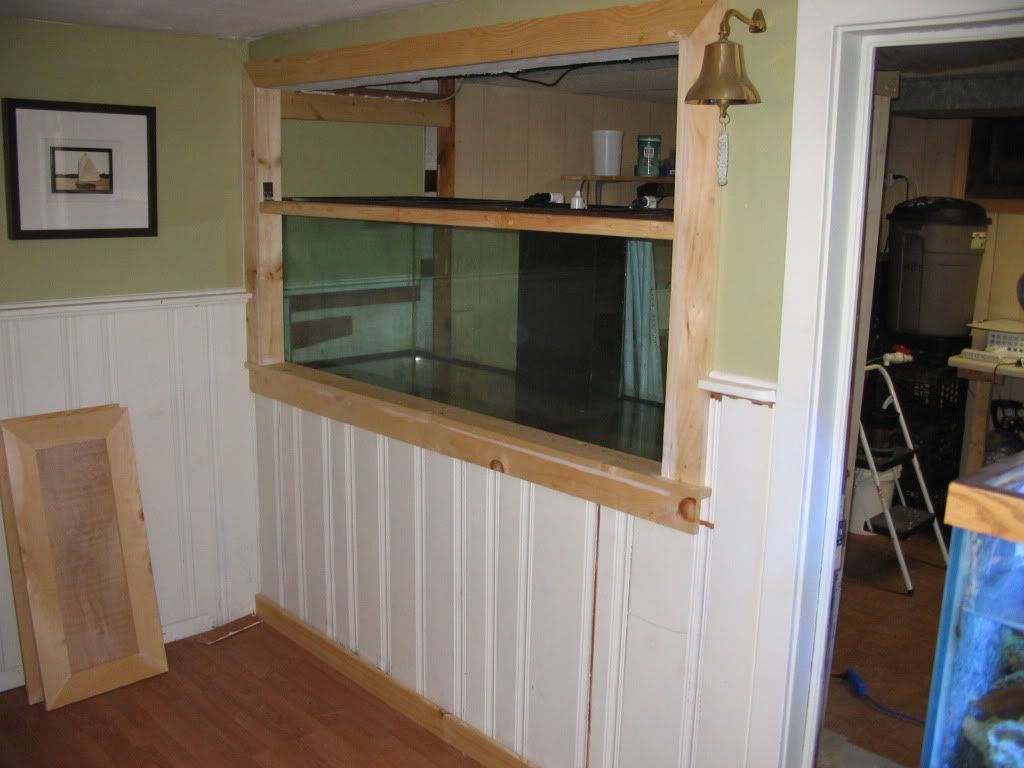
today the demo got done and the tank is in place. gonna level it tomorrow. took a bit of time because i need to save as much as the old tounge and groove "wainscotting" board. that they have most likely not made since 1982. i dont wanna re trim the whole room so i will need to make them work. it looks like i have just enough and with some inventive trimming no one will see a difference i hope.
theone
not so well known member
Looking GREAT.
Are you going to paint the sides of the tank? On the left side of the last pic, it seems you can see the wall through the tank.
I painted the two sides and a put removable black backer on mine. It gives the tank a real 3-D looking affect. When the room lights are low and the tank lights are nice and bright, it brings out the depth of the tank.
Just a thought

OP
OP
cilyjr
Chris
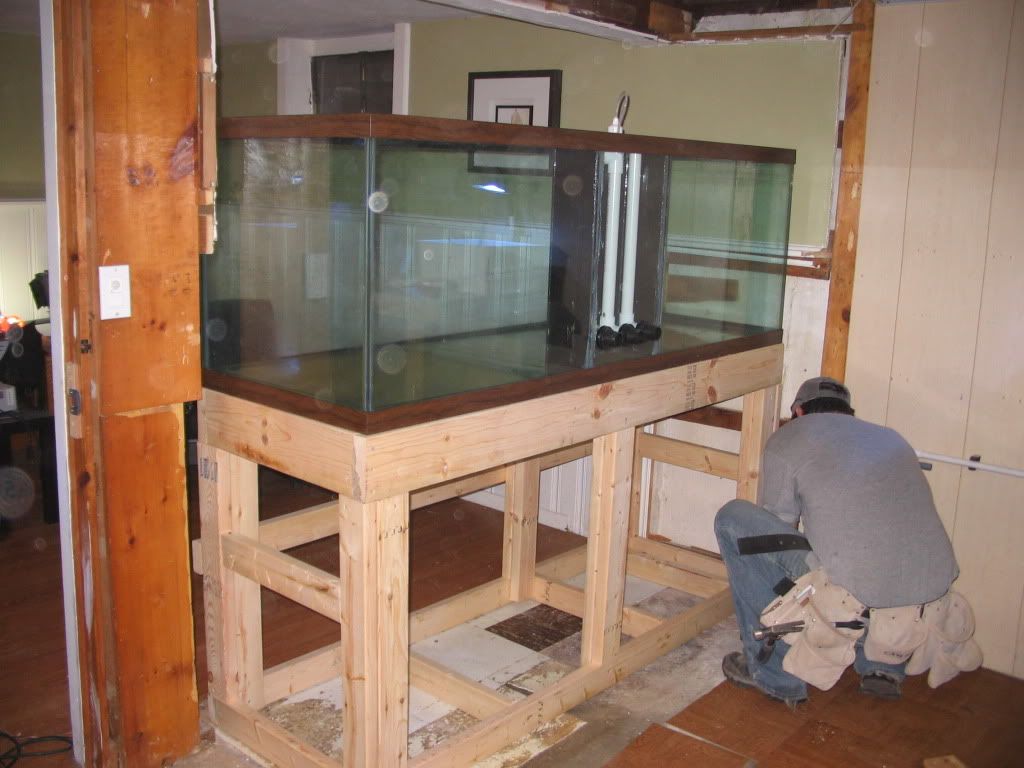
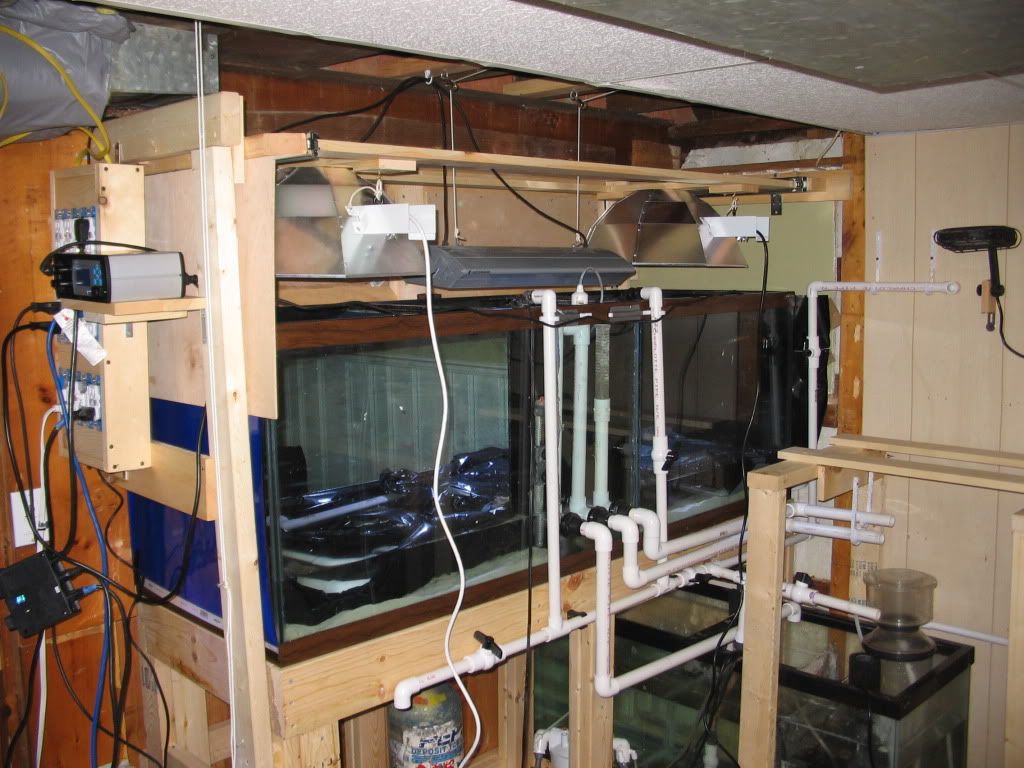
got a lot done today. return plumbing is mapped out and just needs to be glued. and i got the wall back in and the finish framing done its gonna be painted so you can see some caulking to hide my lack of skilled carpentry. cabinet doors are done but i bought the wrong hinges ( the higher powers telling me it was quitting time)so they did not get hung. and i built the rail system for the lighting out of heavy duty drawer sliders. those will be mounted tuesday.

i have been thinking alot about the track for the lights. i want them to be able to slide both backward and forward. for ease of access from both the front and back. the back is not a problem as i can mount them on c rails for garage doors. the front however opens into the finished room so the rails are not an option. what i had thought about was mounting heavy duty 24 inch drawer sliders (these are able to carry alot of weight) to the wheels on the c rail. this would allow the entire lighting carriage to slide back in the rails but when the needed to come forward the drawer sliders would be able to extend....
what do you all think?
Sweet project.
Have you seen this (Liam's build, light sliders, see post #197 on)
http://www.bostonreefers.org/forums/showthread.php?t=71539&page=20
OP
OP
cilyjr
Chris
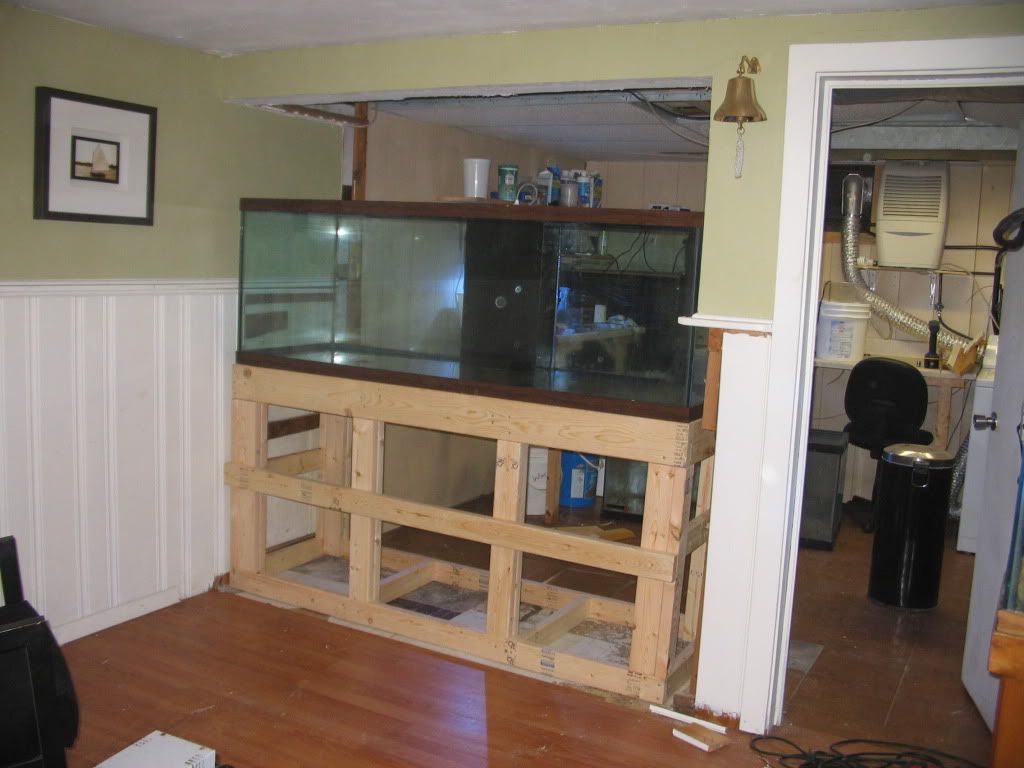
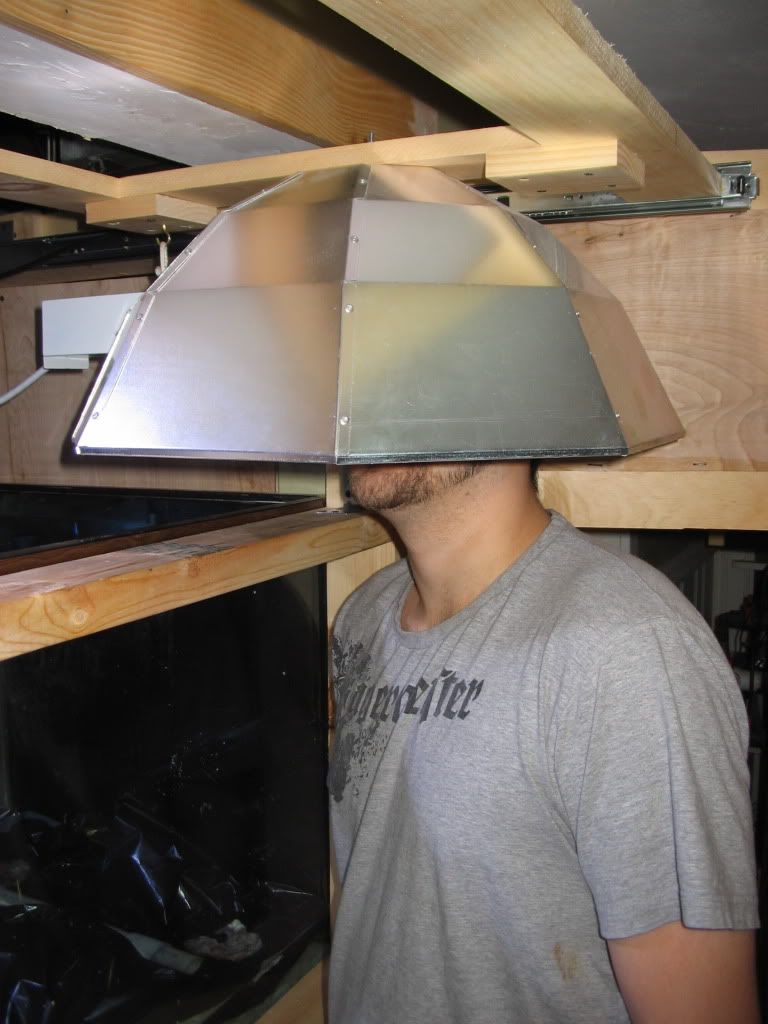
so we are completely done with this build! not really but getting real close got over the last major hurdle which was the lighting system. it woke me up early thinking this. my biggest problem was haveing the lights able to slide into the finished room but not have tracks. i mounted 2 heavy duty drawer sliders together and ran 1x4s to connect them then hang the lumenbrights to rails between the 1x4. now the lights will slide both forward into the finished room or backwards into the fish room. i will mount 4 foot vhos on this rack as well but thats later) the center light is a guiessman fixture and i was concerned about the weight so it is mounted on pulleys so it can be raised or lowered between the 1x4 rails.
my buddy (brs own takara) really loves the look of himself in the reflector...look out ladies!...lol thanks a lot dude for all your help i truly owe ya one!
i also got all the plumbing mapped out and cut it just needs glue. also got the stand built for the 20long
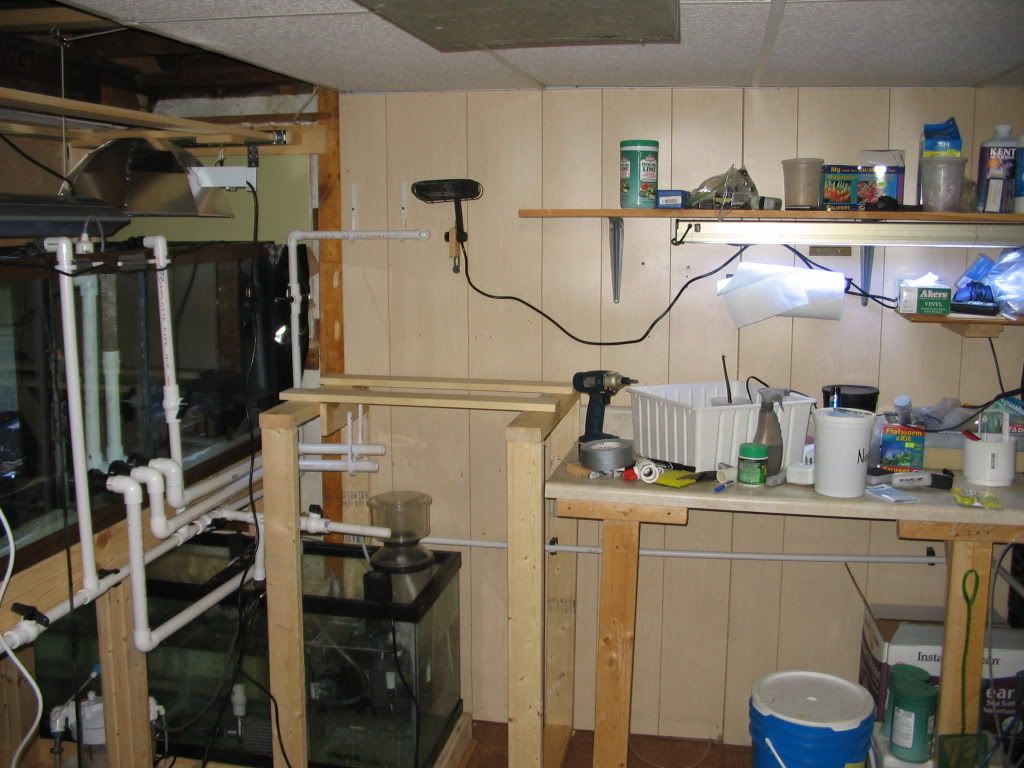
and the finished side is 100% done..alright 95% done gotta touch up the paint...the doorknobs are on the cabinets but not in this pic. i need to take off the bottom trim board and paint it proper and replace a couple of the laminate floor boards but that is all at my leisure. oh and get the 90 out of my house!!!

my buddy (brs own takara) really loves the look of himself in the reflector...look out ladies!...lol thanks a lot dude for all your help i truly owe ya one!
i also got all the plumbing mapped out and cut it just needs glue. also got the stand built for the 20long
and the finished side is 100% done..alright 95% done gotta touch up the paint...the doorknobs are on the cabinets but not in this pic. i need to take off the bottom trim board and paint it proper and replace a couple of the laminate floor boards but that is all at my leisure. oh and get the 90 out of my house!!!
")
Similar threads
Fragsgiving 2026
Sponsors
Acro Garden
All Things Aquatic
Backwoods Reefs
Beantown Reefers
Blue Light Aquatics
Bull Reef Aquaculture
Classic Corals
Corals Kingdom
Crazy Corals
Cultivated Reef
Daves Corals
Frag Freaks
Frank's Frags
Joe's Fishy Business
Love The Reef
Mofo Corals
NEMO
On Point Corals
ReefBum
Reef Exclusive
The Coral Farm
Ultimate Corals
Wet Pets Emporium
WickedCoralGarden