You are using an out of date browser. It may not display this or other websites correctly.
You should upgrade or use an alternative browser.
You should upgrade or use an alternative browser.
3000sf Reef Project
- Thread starter jbundas
- Start date
One final shot from the outside:
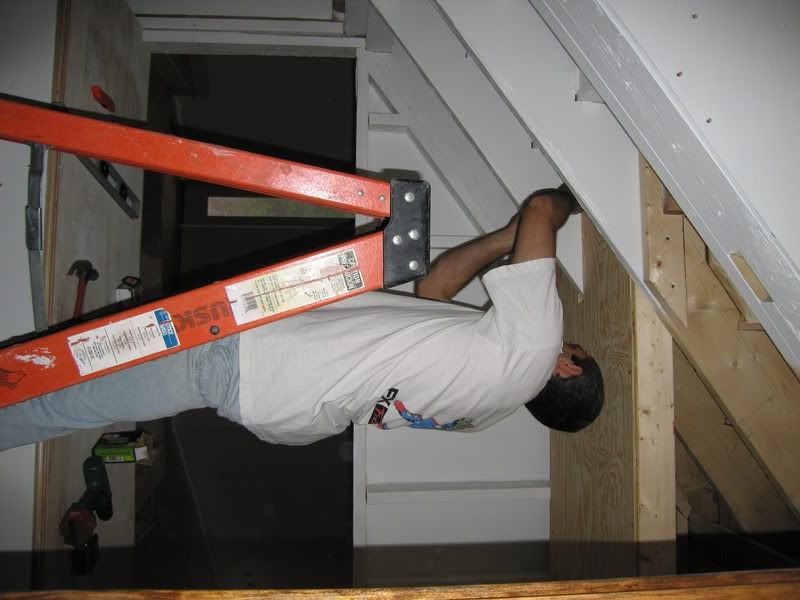
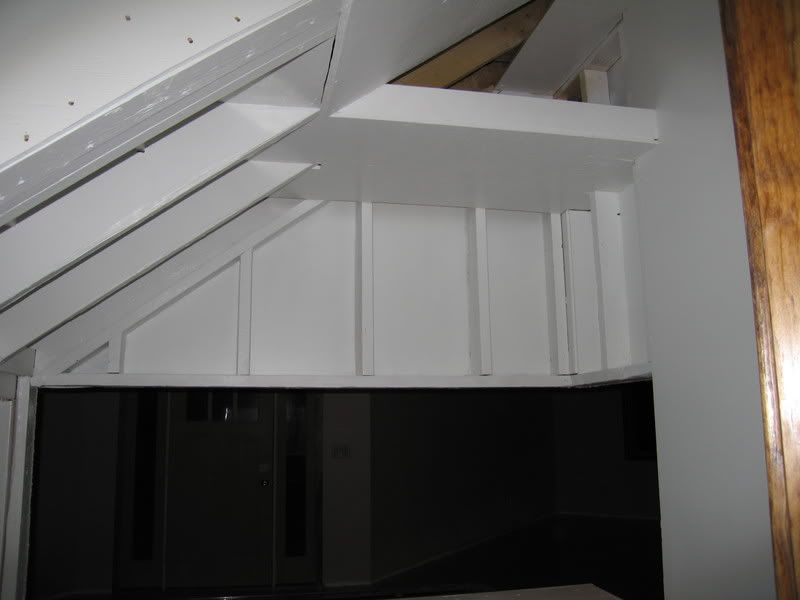
The stand deck has been lightly sanded and painted with the same exterior white. Today's job is re-fabing and installing the aluminum flashing pieces around the opening, putting down the stand liner and getting the tank into it's final resting place so the wood trim can be put around it.
The stand deck has been lightly sanded and painted with the same exterior white. Today's job is re-fabing and installing the aluminum flashing pieces around the opening, putting down the stand liner and getting the tank into it's final resting place so the wood trim can be put around it.
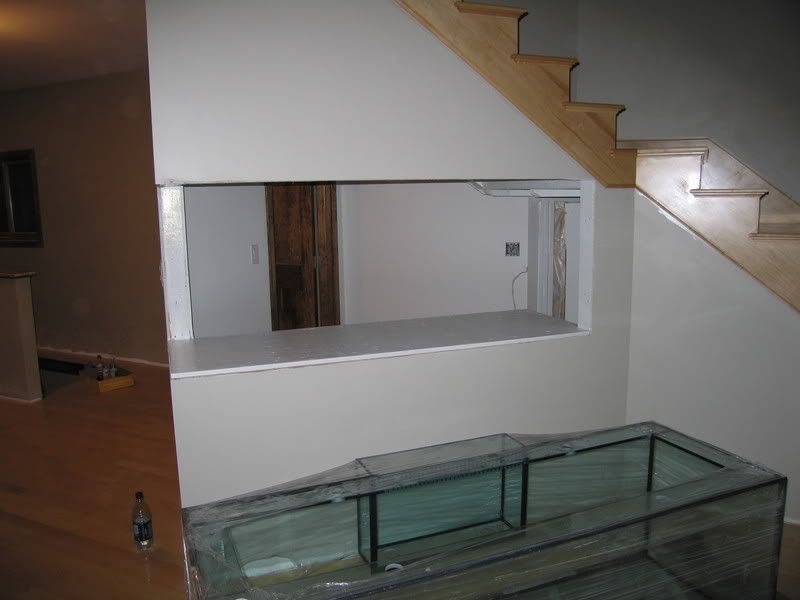
Tank is finally in place with the aluminum around the edges of the wall opening:
Lifting that thing up and in today was definitely more difficult than out and down was yesterday. We ended up putting a few strips of wood down on top of the stand between the foam lining and the tank so it could be slid around and lined up before dropping it down into place. With any luck it'll be trimmed out with moulding next week.
There's about 3.5" between the tank and the top of the wall opening - just enough to get an arm in there if need be to move things around. The aluminum flashing turned out pretty slick. This stuff is great - it's cheap, shiny, easy to work with, holds up to the salt, and Home Depot is loaded with it. It pretty much stayed up by itself but I loaded it up with silicone before sliding it into place the final time and then ran more silicone around the inside edge just for good measure.
Nothing new construction wise, just the shopping trip:
That Fish Place in Lancaster, PA is the way to go. If you have the means, I highly recommend stopping in. Check it out here:
http://www.bostonreefers.org/forums/showthread.php?p=349739&posted=1#post349739
That Fish Place in Lancaster, PA is the way to go. If you have the means, I highly recommend stopping in. Check it out here:
http://www.bostonreefers.org/forums/showthread.php?p=349739&posted=1#post349739
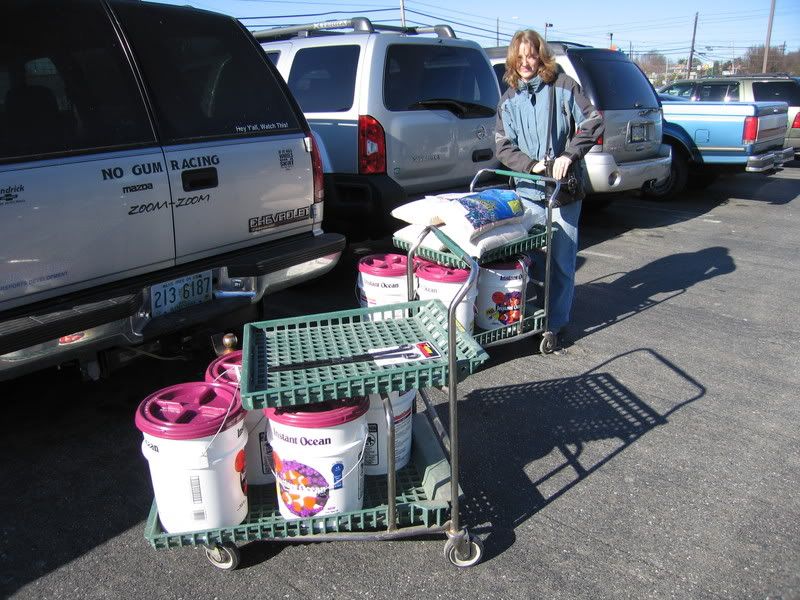
good lord thats a lot of salt  your tank project keeps looking better and better!!!
your tank project keeps looking better and better!!!I must confess that only 6 of those 8 buckets are mine. But at $32 a pop and the whole back end of a Tahoe worth of open cargo space...it'll get used eventually, so will the 5 40# bags of CS aragonite. Those carts were really struggling.
Looking good... now I understand the comments when you were looking at my system
I wish I had known you were going for salt. I could use another 6 buckets!
Yeah, I take mental notes from every system I see, especially remote sump ones. There are countless ways to do everything and it really helps to see ideas up and running. I'm hoping to keep the whole thing as simple and straight-forward as possible. Less complexity meas less problems and changes.
I've just about got the fitting level design for the tank drains and closed loop done. That'll probably be the first thing I get hooked up since the basement sump room still has a bit more to go before it's ready to start taking tubs and such.
I've just about got the fitting level design for the tank drains and closed loop done. That'll probably be the first thing I get hooked up since the basement sump room still has a bit more to go before it's ready to start taking tubs and such.
"although you aren't really "done" yet"
Tell me about. Both houses and tanks are things that aren't ever really done. This is looking to be the first stage of the system construction:
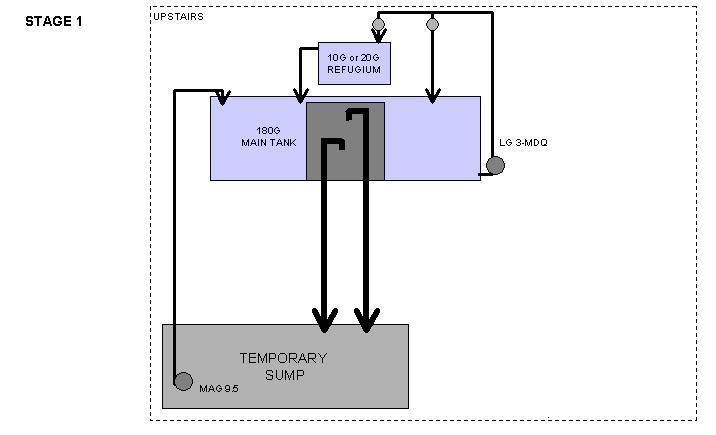
I think I can get all of this up and running without disturbing my current 75g system. I just need to get the bulkheads and the temporary sump container.
I'll wet test it with hose water to make sure it's all good to go then fill it with RO and mix the salt in the tank and sump. Somewhere along the line I'll put the substrate in. I'm thinking that I'll make just enough salt water to get the tank to run through the drains and probably leave the pod fuge empty so that when I do the livestock relocation, I can save as much water from the 75g and use it to fill the sump and pod fuge in stage 2.
Tell me about. Both houses and tanks are things that aren't ever really done. This is looking to be the first stage of the system construction:
I think I can get all of this up and running without disturbing my current 75g system. I just need to get the bulkheads and the temporary sump container.
I'll wet test it with hose water to make sure it's all good to go then fill it with RO and mix the salt in the tank and sump. Somewhere along the line I'll put the substrate in. I'm thinking that I'll make just enough salt water to get the tank to run through the drains and probably leave the pod fuge empty so that when I do the livestock relocation, I can save as much water from the 75g and use it to fill the sump and pod fuge in stage 2.
After I break down the 75g and move all the inhabitants to the new tank, I should be able to do this for stage 2:
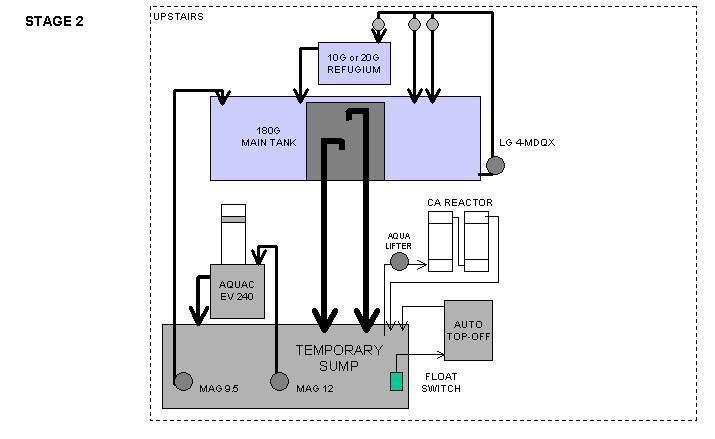
It's just a matter of swapping the closed loop pump and hanging the skimmer, reactor, and top-off from the sump. At this point there are still no holes in the sump since it's all wet pumps so it should be pretty straight forward, just drop in and go. In principle, it could run like this indefinitely which will give me plenty of time to finish off the basement sump room this winter.
It's just a matter of swapping the closed loop pump and hanging the skimmer, reactor, and top-off from the sump. At this point there are still no holes in the sump since it's all wet pumps so it should be pretty straight forward, just drop in and go. In principle, it could run like this indefinitely which will give me plenty of time to finish off the basement sump room this winter.
Have you already bought the EV 240? I've had a 240 for about three years on my 180 and while it's a good skimmer; I think it might be a little undersized for your system. If you do use it, I would recommend the Iwaki 40 series to run it. When I bought mine, they recommended a 30 series pump and I think the 40 would really make a difference.
Gary
Gary
Last edited:
I do have the EV240 already, so I'll start out with that and see how it goes. Ultimately, it comes down to bio-load and I plan to take it easy at first anyway. I was thinking the same thing with the feed pump though. I have the output pretty choked off to get the water level in the tube where I want it while running it on a Mag 12, so I'd like to do something bigger. They recommend an Iwaki 40 now which is one I was also considering for a main return pump, so I was thinking about grabbing one of those and trying it on the return. If it works well (I'm not really betting on it), I'll leave it there and may get another for the skimmer. If it doesn't cut it as a return, I'll just move it to the skimmer and get a 50 or 70 for the return.
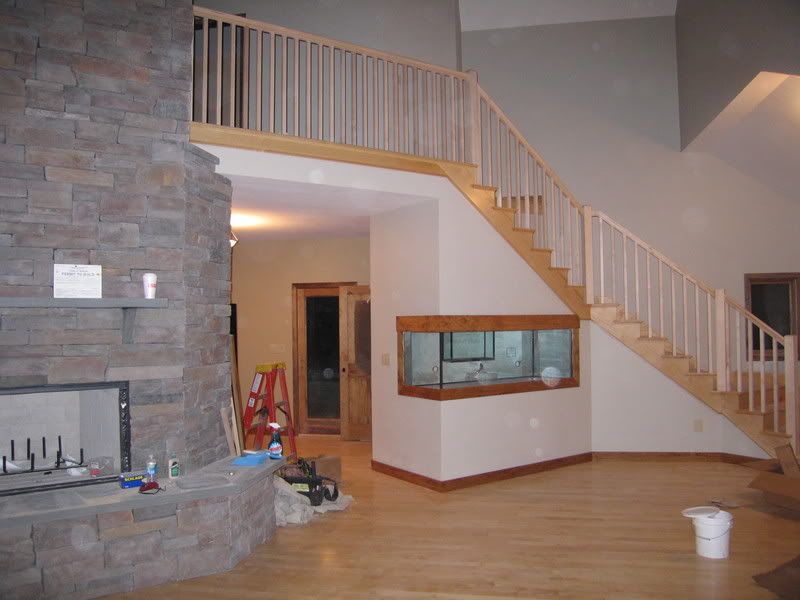
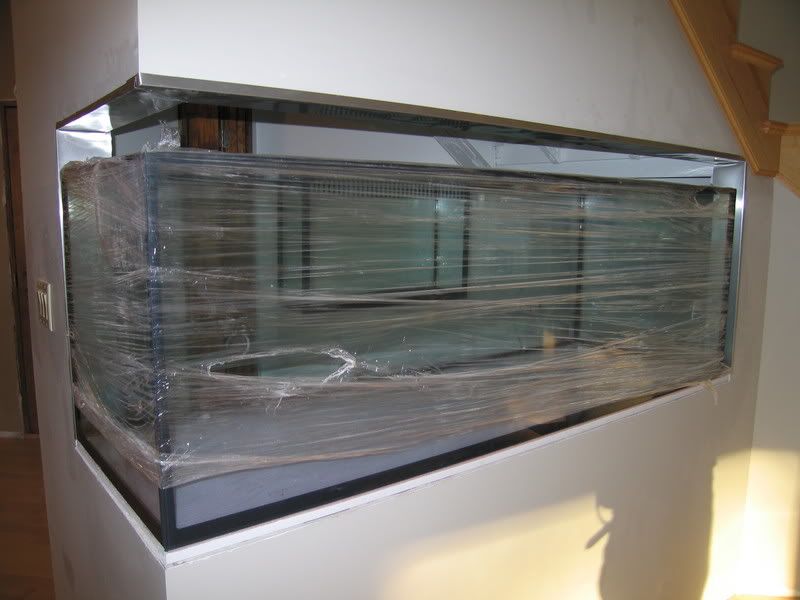
Here's a closer shot:

The top front panel is tacked in with just a couple finish nail so when I figure out how to make it "removable", there will be limited access from the front to help in arranging things. There's still some residue on the glass from the plastic wrap which Windex won't cut without a lot of rubbing, maybe alcohol will do the job. Anyway, I think I'll paint the back of the tank so you can't see through when the tank closet light is on like here.
The top front panel is tacked in with just a couple finish nail so when I figure out how to make it "removable", there will be limited access from the front to help in arranging things. There's still some residue on the glass from the plastic wrap which Windex won't cut without a lot of rubbing, maybe alcohol will do the job. Anyway, I think I'll paint the back of the tank so you can't see through when the tank closet light is on like here.
Similar threads
- Replies
- 6
- Views
- 205
- Replies
- 2
- Views
- 300
