DIY corner overflow box for a 20L - For January 2016 DIY meeting demo

JohnK

Well-Known Member
Staff member
Moderator
BRS Member
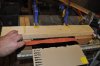
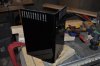
This overflow will be installed in a 20Long as a demo for the January meeting. Cutting acrylic is way too messy to be doing at a meeting venue so I decided to prepare the overflow in advance. At the meeting I'll drill the tank, then install this overflow box.

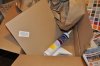
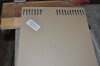
First, getting acrylic sheet and silicone from McMaster. Note that the label on Monmentive RTV has changed. This was @ $26 with shipping.

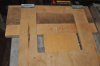
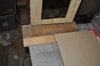
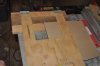
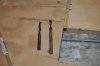
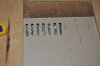
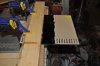
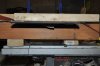
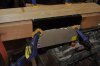
Then pics of the jig I use to cut the slots in slotted overflows.
 

Attachments

  • supplies.jpg
    supplies.jpg
    36.1 KB · Views: 461
  • jig1.jpg
    jig1.jpg
    31.9 KB · Views: 459
  • jig2.jpg
    jig2.jpg
    30.4 KB · Views: 451
  • jig3.jpg
    jig3.jpg
    31.8 KB · Views: 424
Next router bits and the plunge router.

Spiral bits work best for slots like this because they are far less prone to grabbing and chipping the acrylic. One bit is an "upcut" and the other a "downcut". You want to use the one that will pull the chips up and out of the project, which one will do this will depend on if you are using a hand held router or a router table.

If you haven't used one before, the plunge router slides up and down allowing you do drop the bit into the work.
 

Attachments

  • router bits.jpg
    router bits.jpg
    34.2 KB · Views: 436
  • Plunge router.jpg
    Plunge router.jpg
    42.7 KB · Views: 466
Now the Router sitting in the jig.

Place plastic against alignment dowel
clamp jig shut,
insert router, turn on router,
drop router into acrylic using the plunge base, slide router to the bottom of the cut out in the jig to make the slot,
raise router, turn off router,
Open jig, move acrylic over so that the alignment dowel is in the first slot and then each successive slot....
 

Attachments

  • Router in jig 1.jpg
    Router in jig 1.jpg
    40.5 KB · Views: 426
  • Router in jig 2.jpg
    Router in jig 2.jpg
    38.6 KB · Views: 439
  • slots 1.jpg
    slots 1.jpg
    33.5 KB · Views: 464
  • slots 2.jpg
    slots 2.jpg
    30.6 KB · Views: 459
  • slots done.jpg
    slots done.jpg
    28.9 KB · Views: 435
Then preparing to bend the acrylic. This is using a strip heater made for bending acrylic. A heat gun can also be used, but the strip heater is much easier to use and tends to give a nicer end result with a cleaner more even bend.

I clamp the acrylic on a 4x4", heat it, then bend it over and clamp it onto the side of the 4x4 so that I get a nice 90 degree angle. Without clamping while it cools the angle will relax and come out odd. Allow the acrylic to cool completely before unclamping. Heating takes 15 minutes for 1/4" acrylic sheet. Too much time/heat and the acrylic can start to bubble.
 

Attachments

  • prep for bending 1.jpg
    prep for bending 1.jpg
    37 KB · Views: 433
  • Prep for bending 2.jpg
    Prep for bending 2.jpg
    36 KB · Views: 438
  • Prep for bending 3.jpg
    Prep for bending 3.jpg
    38.5 KB · Views: 465
  • bending.jpg
    bending.jpg
    38 KB · Views: 439
Finished
 

Attachments

  • Finished overflow.jpg
    Finished overflow.jpg
    34 KB · Views: 444
Back
Top