You are using an out of date browser. It may not display this or other websites correctly.
You should upgrade or use an alternative browser.
You should upgrade or use an alternative browser.
Jenn's 72 Bow Rebuild from Start to enjoyment (hopefully)
- Thread starter Jennifer
- Start date
OP
OP
The red led fans are a cool touch, what exactly does uv reactive mean?
I thought they looked pretty cool.
They glow red in the presence of uv light, blacklights are the best but they will react to actinic light as well.
Mainly I bought them because they are red while off and light up red when on.
Plus their specs looked good as well.
gajopo
Your one industrious, calculated and thorough person! I can't wait to see more. Impatiently waiting for the end result.
No pressure...
Thanks for the kind words, I am anxious to see the end result as well.
OP
OP
The Awaited DIY Kalk Stirrer !
Well here it is...
I got the mods done on it that I wanted to.
When I first built this I had to unscrew it and stir up the kalk by hand.
When that got tiring I started digging through the boxes of tank stuff and happened across a tiny hob filter with a pump that was held in by a twist lock.
That is pretty much the story, out came the dremmel and got right int it grinding plastic for a few hours.
The area on the bottom of the hob filter where the pump is locked into is needed to attach the pump to the bottom of the RO cannister. The tube in the middle is the hob filters siphon tube with the U part removed and the remaining end connected together with a short piece of pipe. I glued the part off of the hob filter into the bottom of the canister and then added epoxy putty to strengthen the joint and make sure that it stays water tight.
After the stir pump mod it was still nescesary for me to open the unit in order to add more kalk.
I figured it would be possible to instead add a valve to the top as a way of injecting a kalk slurry into the reactor. I have a 60 ml plastic tip syringe that I will use to inject the slurry.
On the bottom is a drain, just in case I need to flush out the reactor.
This should make it so that I only have to open the reactor only once in a great while.
OP
OP


The Return line with dual 3/4 loc line outs.
I decided to put it up front to keep from shading any corals in the middle of the tank. This is a bow front after all and real estate under the lighting is crucial.

I am still waiting for my black caulking to show up in the mail so that I can glue the overflow back on the tank.
Once that is here I can glue the the drain on to the back and put some water in this thing.
Oh yea and finish cleaning the inside of the tank.
Last edited:
Wow looks great!
Man this is going to be intense it already is what am i talking about?... I like the red fans and the red plumbing nice touch. those fans are really nice have green ones in a computer that i started to build with my dad.
OP
OP
Man this is going to be intense it already is what am i talking about?... I like the red fans and the red plumbing nice touch. those fans are really nice have green ones in a computer that i started to build with my dad.
Thanks !
Yea I love these LED fans.
Looking great Jen!
Thanks Matt! Your tank build is looking great.
OP
OP
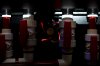
Red Fans = Cool !
Well my fans showed up this afternoon.
So after dinner I set off to start building 1 of the fan brackets. Still a few more to do but I thought I would share this 1 with you guys.


These look so cool in the stand , pun intended.")
Now that I have stared at my new fans enough I guess it is time for bed.
Well my fans showed up this afternoon.
So after dinner I set off to start building 1 of the fan brackets. Still a few more to do but I thought I would share this 1 with you guys.
These look so cool in the stand , pun intended.
Now that I have stared at my new fans enough I guess it is time for bed.
OP
OP
Oh yea, (got a question about this in a PM )
I forgot to mention that I am feeding the RO in on the kalk reactor with a tom aquatics aqua lifter pump. I have a valve inline which lets me regulate the drip rate of kalk out of the reactor.
Am I explaining this stuff enough for you guys?
Should I go into more detail or just keep doing what I am doing?
Any questions about the setup thus far?
If you do not want to "dirty" the thread you can PM me if there is something you are curious about.
OP
OP
Fan bracket 2 done !
I am still waiting for my black caulking to arrive. The tracking says it will be here tomorrow.
So the full water test will be on friday.
Woohoo cant wait.
I will finish glueing the water change pump in later today. So all is go for friday.
While I had some time today I figured I would get the last of fan brackets that go into the stand done.
I do have a few more to do for the canopy, but that will come shortly when I do the whole canopy at once with the lighting and all.


Tools used:
chop saw and a jig saw to cut out my pattern.
3" hole saw for the hole.
Heat gun to heat the acrylic for bending.
Thanks for looking and the positive words of encouragement yall.
I am still waiting for my black caulking to arrive. The tracking says it will be here tomorrow.
So the full water test will be on friday.
Woohoo cant wait.
I will finish glueing the water change pump in later today. So all is go for friday.
While I had some time today I figured I would get the last of fan brackets that go into the stand done.
I do have a few more to do for the canopy, but that will come shortly when I do the whole canopy at once with the lighting and all.
Tools used:
chop saw and a jig saw to cut out my pattern.
3" hole saw for the hole.
Heat gun to heat the acrylic for bending.
Thanks for looking and the positive words of encouragement yall.
OP
OP
Thar be water in there !!!
The water test went well.
I got the fresh tap water in and fired it up on Saturday at about 4:30.
Has been running great since then.
I also tested the quick water change system and I get about 15 gallons at one time.
The best part is that so far everything is really quiet even with all of the pumps running.
Next up this week is stain the wood work and get the rock all built and into the tank.
The I will be ready for Saltwater.


OP
OP
More cool shots !


And the loc line penductor mentioned in this thread.
IMHO these things actually do increase the flow from the return pump. Now of course a true penductor is going to give more flow.
This however is a cheap way to get just a bit more flow with out having to pay more money.

And the loc line penductor mentioned in this thread.
IMHO these things actually do increase the flow from the return pump. Now of course a true penductor is going to give more flow.
This however is a cheap way to get just a bit more flow with out having to pay more money.
Very cool looking!
OP
OP
WOW Jennifer, love the fans but I needed a 120mm fan for my stand.
Thanks Ronnie
You made your fan look cool with the great exposure time !
I tried that but was not as cool as your shot. If you look at my last fan shots you can see the motion blur of the fan running but the fan blade is still sharp looking. I used my fill flash to momentarily stop the motion.
Very cool looking!

Similar threads
- Replies
- 0
- Views
- 109
- Replies
- 1
- Views
- 389
- Replies
- 0
- Views
- 306
