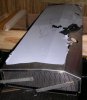
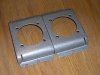
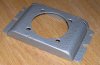
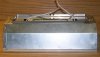
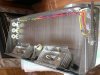
For my 75 that is. I like my low profile canopy soo I want to use it.To get the spread from the hailde my hood would have to be about 12" off the water n/g for me.Angles(If I've done my calculations right) will direct the light in a better spread for my hood height. In the end view you can see the rad shape.Look at the flat area on top that will be nothing but the slope to the right of that will be 2 x 150 w DE fixtures.The light from the halides will hit the back wall and the bottom but not out the front no waste of light that way either.The long angled slope to the left will be 3 x 54 t5's w/ reflectors overdriven.To combat heat each DE fixture will have it's own fan.You can see the holes for the fans in the second pic.
I like my low profile canopy soo I want to use it.To get the spread from the hailde my hood would have to be about 12" off the water n/g for me.Angles(If I've done my calculations right) will direct the light in a better spread for my hood height. In the end view you can see the rad shape.Look at the flat area on top that will be nothing but the slope to the right of that will be 2 x 150 w DE fixtures.The light from the halides will hit the back wall and the bottom but not out the front no waste of light that way either.The long angled slope to the left will be 3 x 54 t5's w/ reflectors overdriven.To combat heat each DE fixture will have it's own fan.You can see the holes for the fans in the second pic.